
Every year or so, I get a strange itch to try a different hosting arrangement for my own projects.
Last year around this time, I tried running a self-hosted Kubernetes cluster with k0s and Lens. It worked really well and I was living the dream until everything died and I found myself catastrophically in over my head. I extracted myself from the rubble and didn’t look back.
This year’s quest went much better: I migrated five servers and a few handfuls of self-hosted apps to a new Coolify instance.
Coolify is a web hosting platform as a service, meaning you can conveniently host projects that are deployed with ephemeral, scalable pieces that are defined with code. It compares itself to services like Heroku and Vercel, and you can subscribe to the hosted version or host it yourself. I should probably pay more competent people to host things for me, but I still love personal hosting adventures so I opted to go that route.
After the typical new tool learning curve, my big challenge was to containerize some of my own projects.
I’ve worked with projects other people skillfully chopped up into containers, but that’s not my comfort zone. I typically use a tool to provision a web server, then set up an app and update it with git-based deployments using Composer and npm. When there’s an urgent dumpster fire, I can swoop in via SSH or SFTP and do something unsavory to contain the problem before deploying a proper fix. I don’t do that much anymore, but knowing how to get at all the pieces gives me confidence.
I’ve enjoyed using Ploi and still cheerfully recommend it to anyone hosting modest PHP projects. Even so, I always want to be living the Docker dream of containers all the way from production to my local environment.1
I have a mixture of projects spread across standalone Docker servers and other ones provisioned with Ploi—all running Ubuntu. (I went through a CentOS phase but I’m more familiar Ubuntu.)
I use DDEV locally, which is like Docker training wheels not meant to have any direct relationship to the production environment.
A few weeks ago I was primed for misadventure when I snagged a sweet deal on a fast little VPS.
Installation
New server metaphorically in hand, I remembered I heard of Coolify a while ago and wanted to try it. So I followed the self-hosted installation instructions on a fresh Ubuntu 24.04 server:
$ curl -fsSL https://cdn.coollabs.io/coolify/install.sh | bash
-------------
Welcome to Coolify v4 beta installer!
This script will install everything for you.
Source code: https://github.com/coollabsio/coolify/blob/main/scripts/install.sh

-------------
OS: ubuntu 24.04
Coolify version: 4.0.0-beta.325
-------------
Installing required packages...

... roughly two minutes and a jillion lines later ...

Waiting for 20 seconds for Coolify to be ready...
Please visit http://[ip-address]:8000 to get started.

Congratulations! Your Coolify instance is ready to use.
Amazingly enough, there it was!
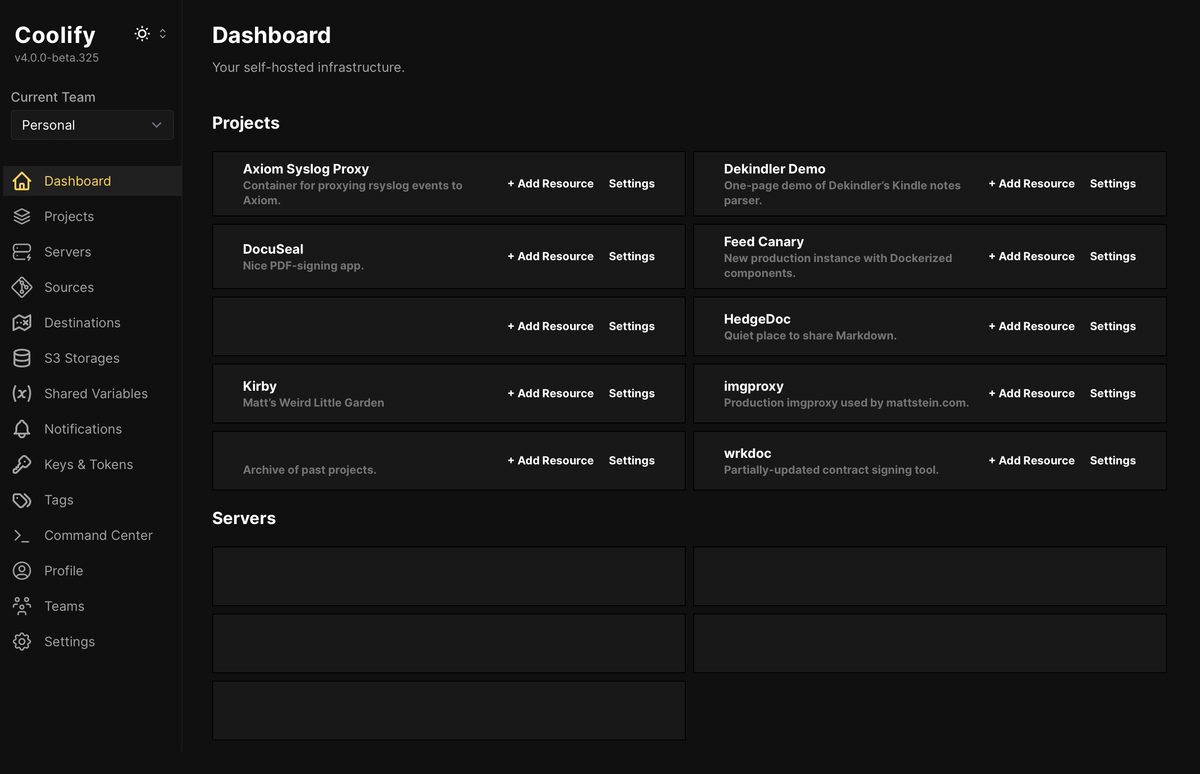
After a brief, friendly onboarding process, the dashboard:
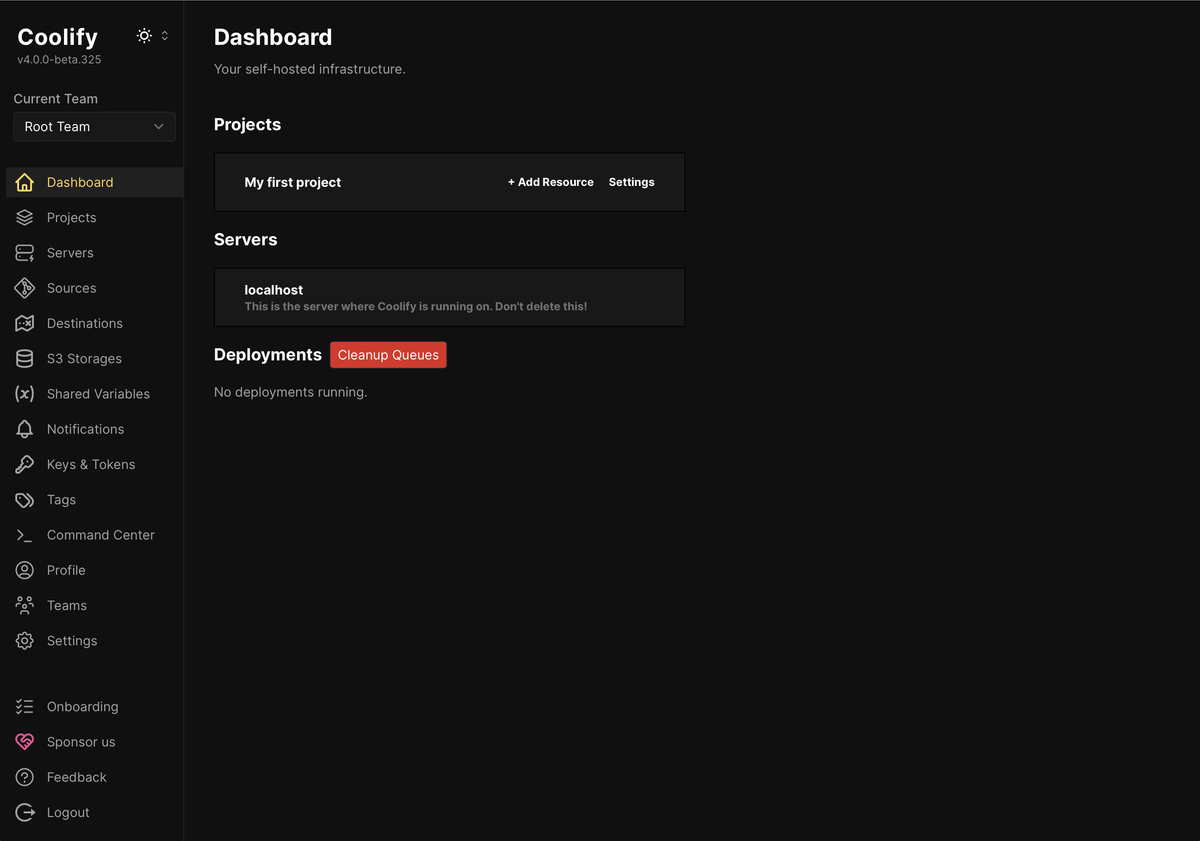
It didn’t take long to make sense of the layout, and I like that I could immediately run apps on the same server Coolify was using. It doesn’t care where you choose to spin up projects, which made it easy to give some a temporary new home while I prepared additional servers for them.
Kicking the Tires
A directory of open source apps makes it nearly effortless to deploy something and have a look at it. By default, Coolify will even generate a .sslip.io domain you can use if you don’t want to temporarily fiddle with your own DNS records.
I should back up and mention that anything you add to a server is most generally referred to as a “resource.”
These resources can be applications you point to, click-to-add databases, or services from a long list of preconfigured stacks ready to spin up with Coolify.
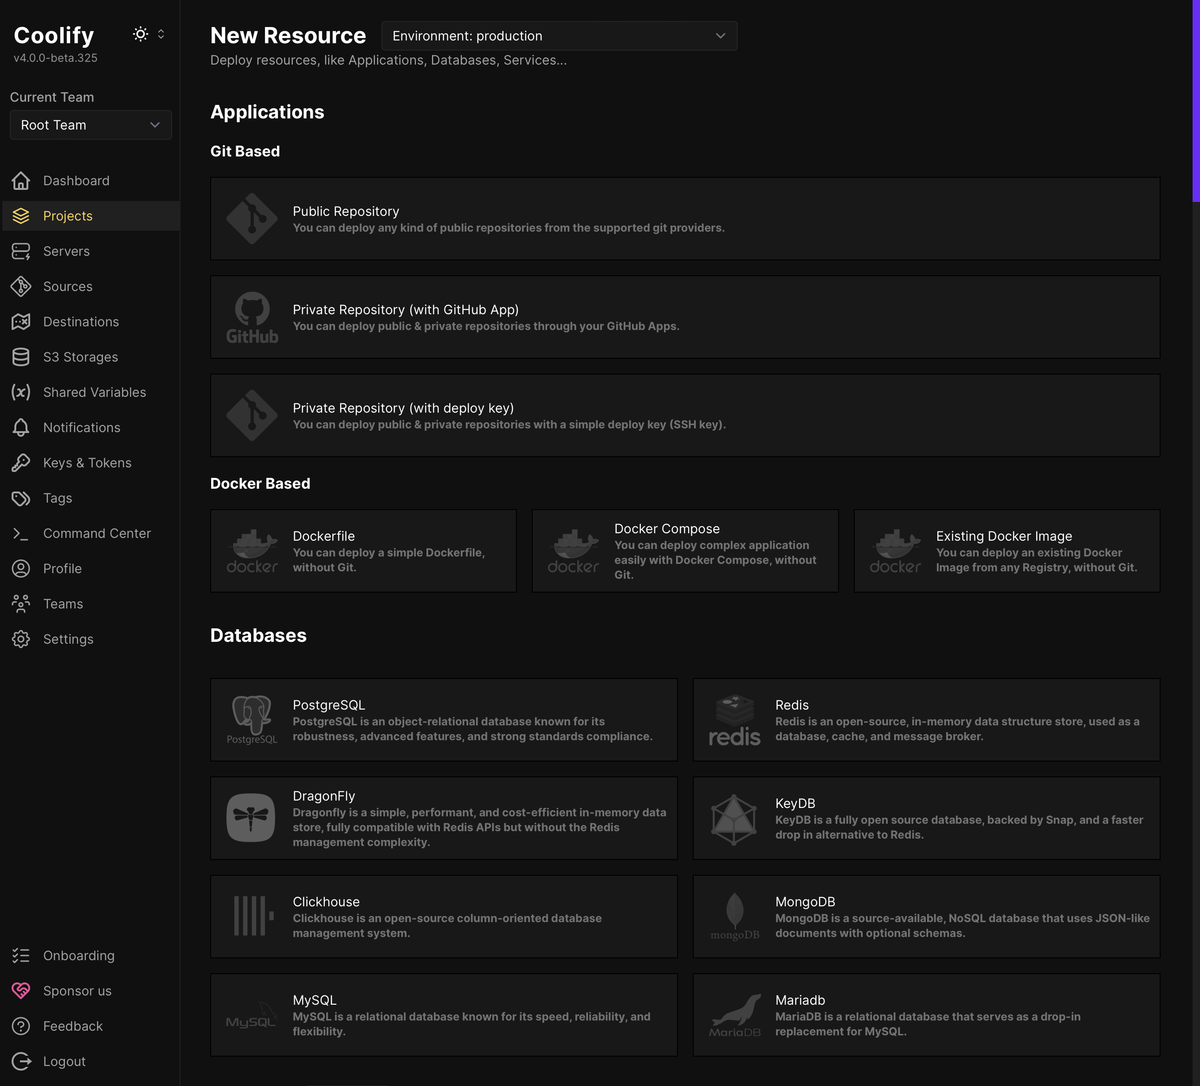
You can add applications in a few ways:
Via Git
- From a public git repository, where (spoiler!) you will not get automatic commit-based deploys unless you wire up your own webhook.
- From a private GitHub repository, via a GitHub app Coolify will help you create quickly for access to a single organization’s repositories.
- From a private git repository using an SSH deploy key.
Via Docker
- Using a pasted-in Dockerfile.
- Using a pasted-in Docker Compose file.
- Using a specified Docker image from any registry.
If your git-based project includes a Dockerfile or Docker Compose file, you can tell Coolify where to look for either one in its repository. (It’ll check the project root by default.)

Once you do point your own A record at the server’s IP address, magic happens.
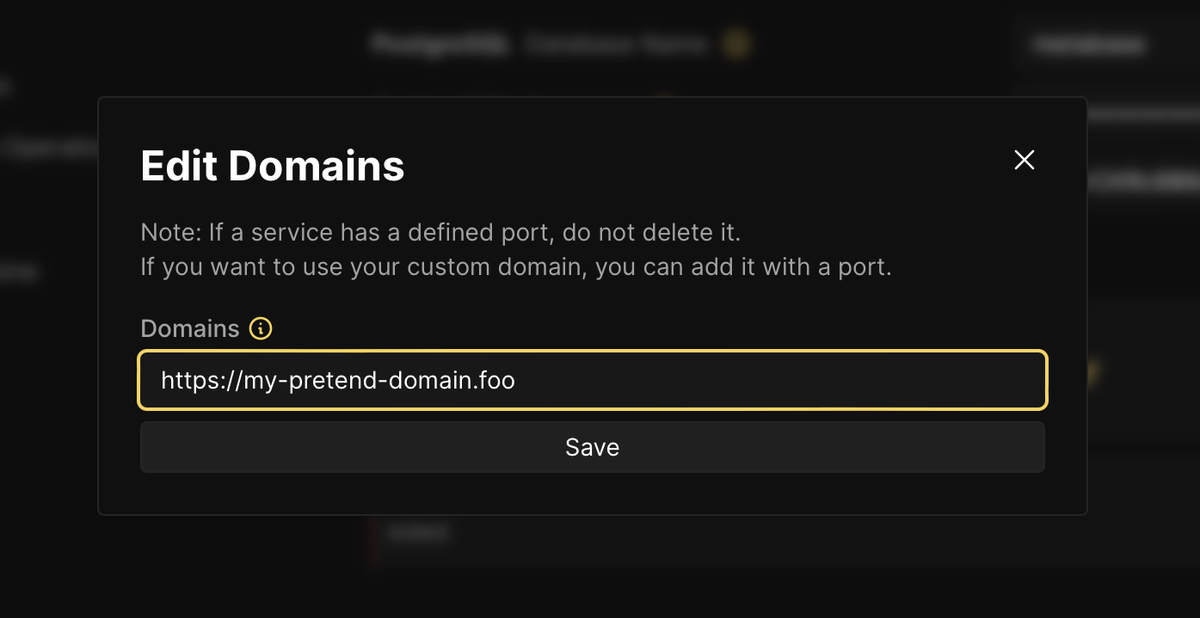
After updating the domain and redeploying, I think it’s Traefik under the hood that automatically obtains a Let’s Encrypt certificate. There is no additional step; visit the app in a browser and wait for the SSL warning to disappear when the new certificate arrives in a few seconds.
Adding Servers
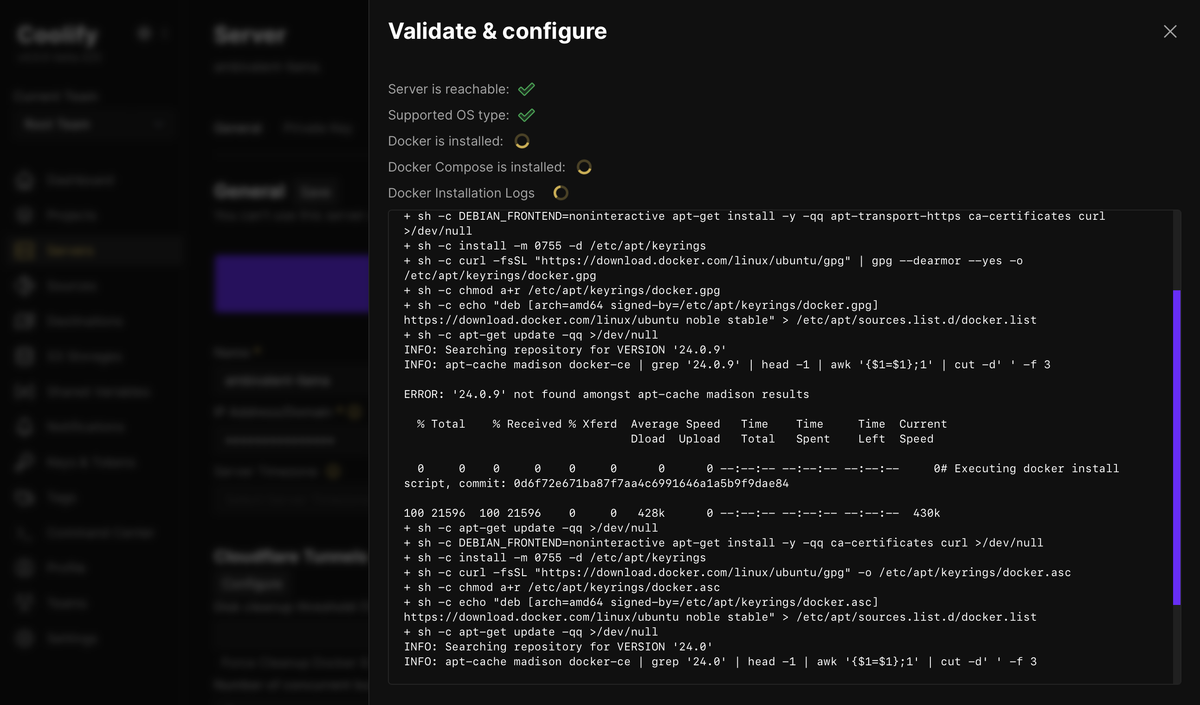
For each server I added, I’d start with root access and an up-to-date Ubuntu 24.04 system. After adding authorized_keys and disabling password-based SSH logins, I’d use the Coolify GUI to provide an IP address and name.
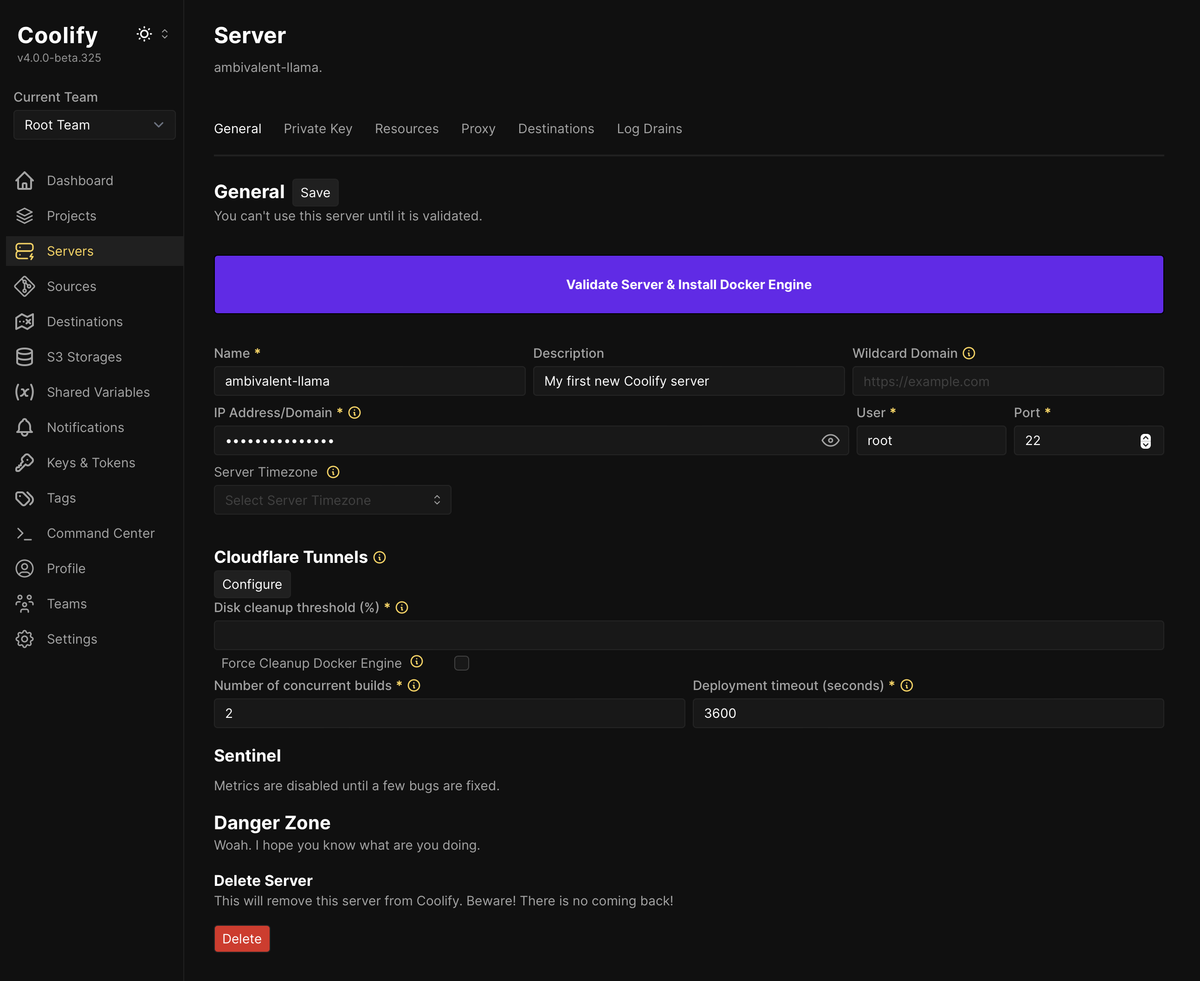
Coolify validates the connection, then installs Docker on that server.
That was it. The new server was then available when creating a new project.
Migrating the Easy Apps
imgproxy
If you’ve built a CMS-based project on the internet, you’ve dealt with automatic image transforms where a source image is cropped and resized in various formats to best suit however it’s used.
You’ve also noticed that this is a computationally expensive process, and there are services like imgix and Cloudflare Images you can use to offload that processing burden.
imgproxy is a self-hosted image processing service that’s shockingly fast, and it’s one of the easiest things I’ve ever spun up with Docker. (It was also delightful to scale during the more fun part of my failed Kubernetes experiment.)
So getting imgproxy running from the darthsim/imgproxy Docker image was trivial.
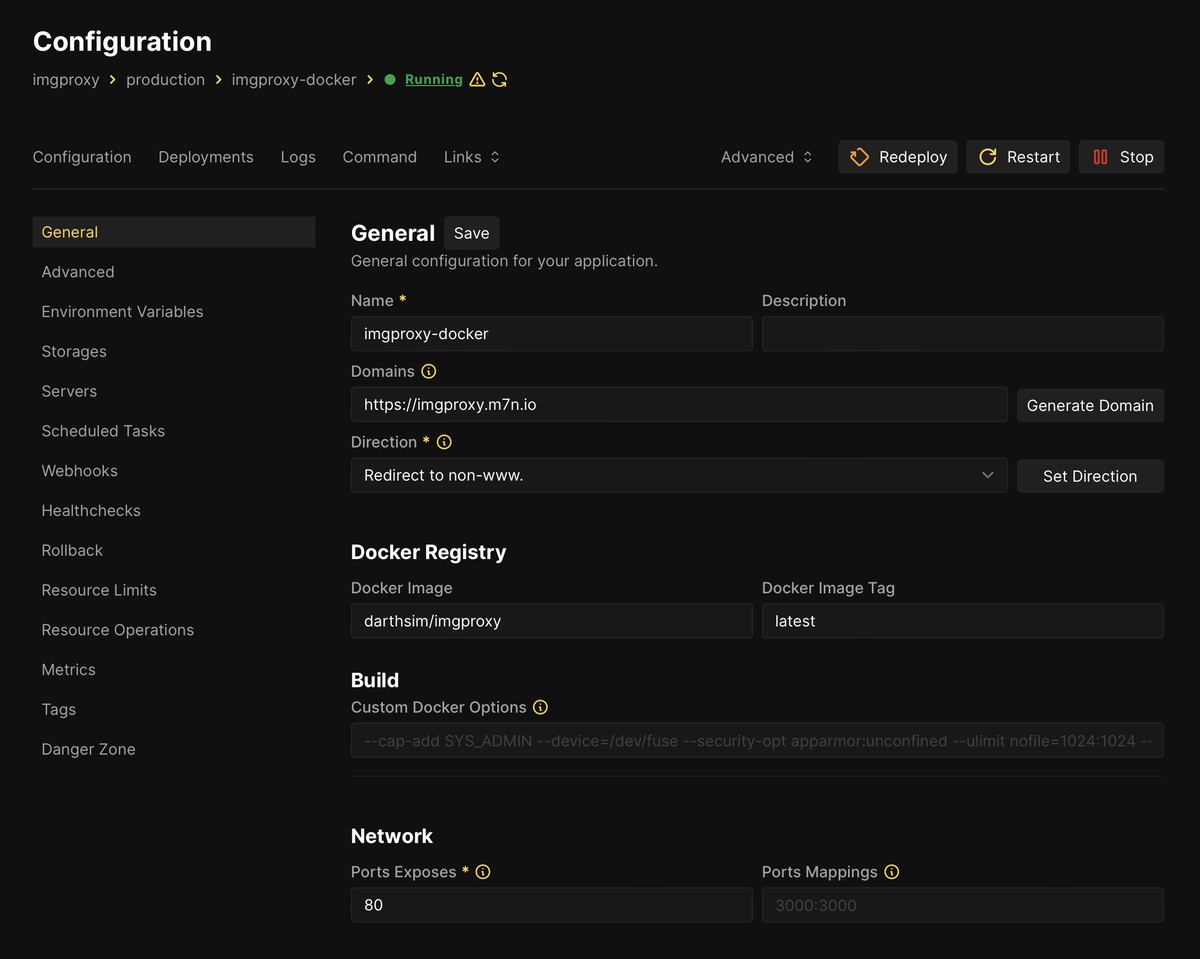
I’m just using it for the site you’re now reading on, so if the images are broken in this post we can have a good laugh together.
Dekindler Demo
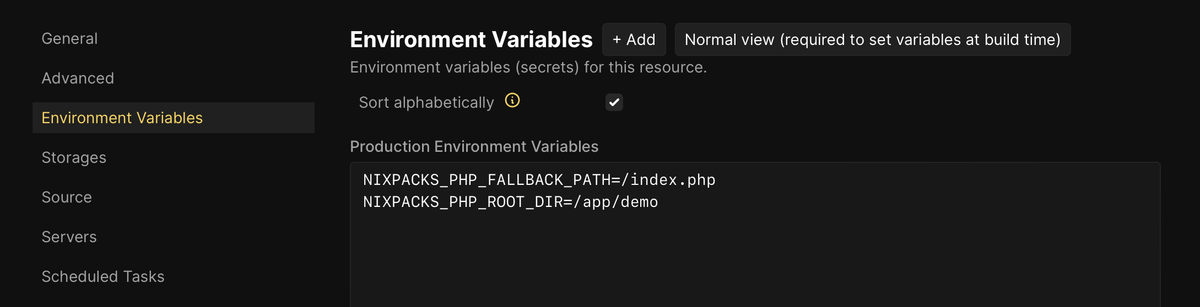
Next came the one-page demo for a Kindle note parser I wrote. I’m not sure if anyone other than me has used it, but I worry that someday a person might and so I keep hosting it for them. It only needed to install Composer dependencies and run some PHP, for which Nixpacks were perfect.
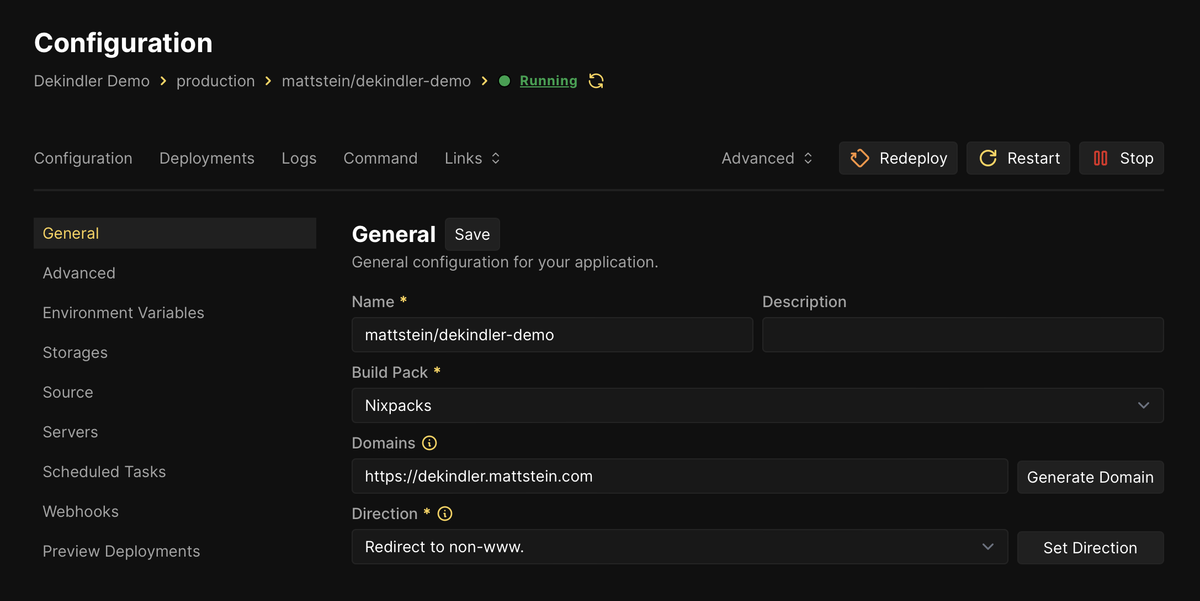
Nixpacks, new to me in this adventure, look at a project’s code to determine what language and framework it might be running. They aim to spin it up without any configuration, and for a simple enough project they seem to work amazingly well.
The only thing I needed to figure out was how to tell Nixpacks to find the document root and index.php file since they’re in an unusual subdirectory. Thankfully the PHP docs clarify that you can do this with environment variables:
Kirby
I use Kirby for a separate blog, and an article about running it on Fly.io inspired me to rearrange my directory layout for easier persistent storage.
I decided against running with Fly.io, but that experiment accidentally prepared me for Dockerizing the project.
The Dockerfile I build from, using the beautifully-documented serversideup/php images I’m a new fan of:
FROM serversideup/php:8.3-fpm-nginx

ENV PHP_OPCACHE_ENABLE=1

# Switch to root so we can do root things
USER root

# Install PHP extensions
RUN install-php-extensions gd imagick/imagick@master iconv intl

# Copy our app files as www-data (33:33)
COPY --chown=www-data:www-data . /var/www/html

# Drop back to our unprivileged user
USER www-data

RUN composer install --no-interaction --optimize-autoloader --no-dev
You’ll see a reference to that Dockerfile in the bottom of the project settings:
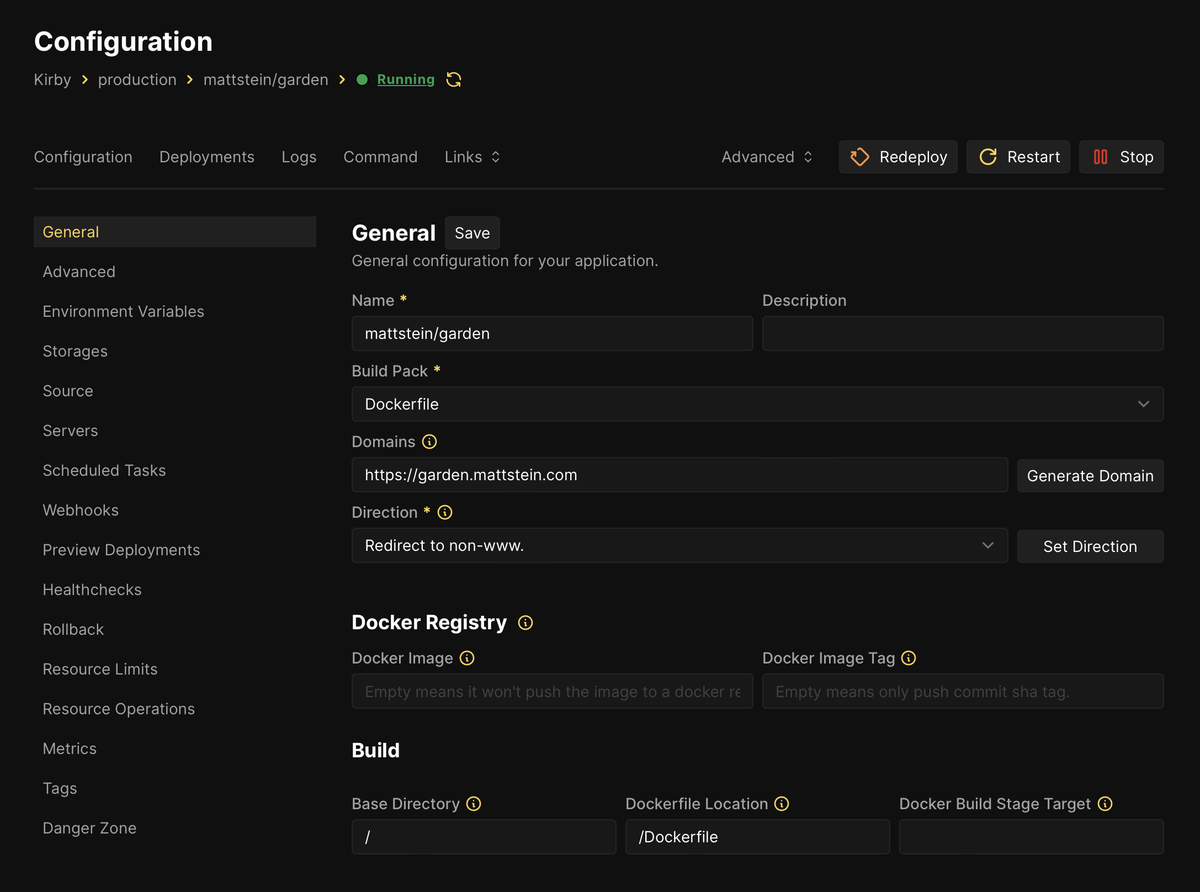
Kirby gets uncomfortable with the reverse proxy making site requests, but you can help it stay calm by telling it exactly what domain the site should be served at.
I adjusted site/config/config.php to use a SITE_URL environment variable when present, which I only set in production:
$urlSettings = [];

if ($siteUrl = getenv('SITE_URL')) {
    $urlSettings['url'] = $siteUrl;
}

return [
    // ... existing config ...
    ...$urlSettings
];
The project mounts storage/ and public/media/ directories so those files can persist. (Because containers are reborn all the time, but we want some files to stick around.)
The part that took me longest was figuring out how to deal with the license, which I could activate successfully but would revert to deactivated status with each container rebuild—a telltale sign that something is being written to the filesystem and accidentally wiped.
I ended up adopting Luigi’s approach and adjusting site/config/config.php again to read the license from an environment variable if it wasn’t already set:
'ready' => function($kirby) {
    // Read license from environment variable if `/site/config/.license` doesn’t exist
    $license_file = $kirby->root('license');
    $license = getenv('KIRBY_LICENSE');

    if ($license && !F::exists($license_file)) {
        F::write($license_file, $license);
    }
},
A few broken front-end links taught me that the UUID cache matters! Either migrate that storage/cache/[site]/uuid/* along with your site, or regenerate those UUIDs—otherwise links like /@/page/H4KvjG4fGFxkz9KP will return a 404.
Site Archive
The last straightforwardish project I migrated was a series of static sites I keep at individual subdomains. These are glorified snapshots of projects I can use like a portfolio, no matter what happens to production over the years.
It’s structured like this:
items
  site-a
    index.html
  site-b
    index.html
  site-c
    index.html
web
  index.html
The resulting sites I’d need are domain.tld, site-a.domain.tld, site-b.domain.tld, and site-c.domain.tld. This amounted to using a very simple Dockerfile:
FROM nginx

COPY --chown=www-data:www-data . /var/www/html

COPY nginx.conf /etc/nginx/nginx.conf

EXPOSE 80-83
Notice exposing ports 80–83, because all my nginx.conf directive does is define a server block for each site with a specific document root and port.
http {
  # ...

  # Top-level landing
  server {
    listen 80 default_server;
    listen [::]:80 default_server;

    server_name _;

    root /var/www/html/web;
    index index.html;

    location / {
      try_files $uri $uri/ =404;
    }
  }

  # First site
  server {
    listen 80 default_server;
    listen [::]:80 default_server;

    server_name _;

    root /var/www/html/items/site-a;
    index index.html;

    location / {
      try_files $uri $uri/ =404;
    }
  }

  # Continues for site-b and site-c

  # ...
}
Coolify’s Domains config setting looks like this:
https://domain.tld:80,https://site-a.domain.tld:81,https://site-b.domain.tld:82,https://site-c.domain.tld:83So the directory structure maps neatly to all these domains:
items
  site-a    site-a.domain.tld:81
  site-b    site-b.domain.tld:82
  site-c    site-c.domain.tld:82
web         domain.tld:80
As the visitor, you don’t see ports like :80 or :81 in the URLs, that just tells Coolify to route the given domain to the designated container port. Cool, right?
Migrating the Harder Apps
With the simpler apps out of the way, I moved on to ones that involve other services like in-memory caches and databases.
HedgeDoc
I started with HedgeDoc thinking it would be easy.
HedgeDoc is a quick, collaborative Markdown pad I use as a place for sharing drafts and notes that are a bit more complex than GitHub Gists. It’s a deep and highly configurable app, but hosting it on Ploi (with pm2) was pretty straightforward and I already had a Docker Compose example to run with.
Ultimately I learned that I needed to specify environment variables in the Docker Compose file and not Coolify’s GUI. They are not the same thing, but you can reference Coolify GUI environment variables with placeholders in the Compose file.
I also learned you can import an SQLite database dump directly into PostgreSQL. There was nobody in the room when I said “well that’s cool,” but I get to tell you that now. Maybe you already knew.
Because I started with a pasted, standalone Docker Compose file, Coolify considers this a “Service Stack”:
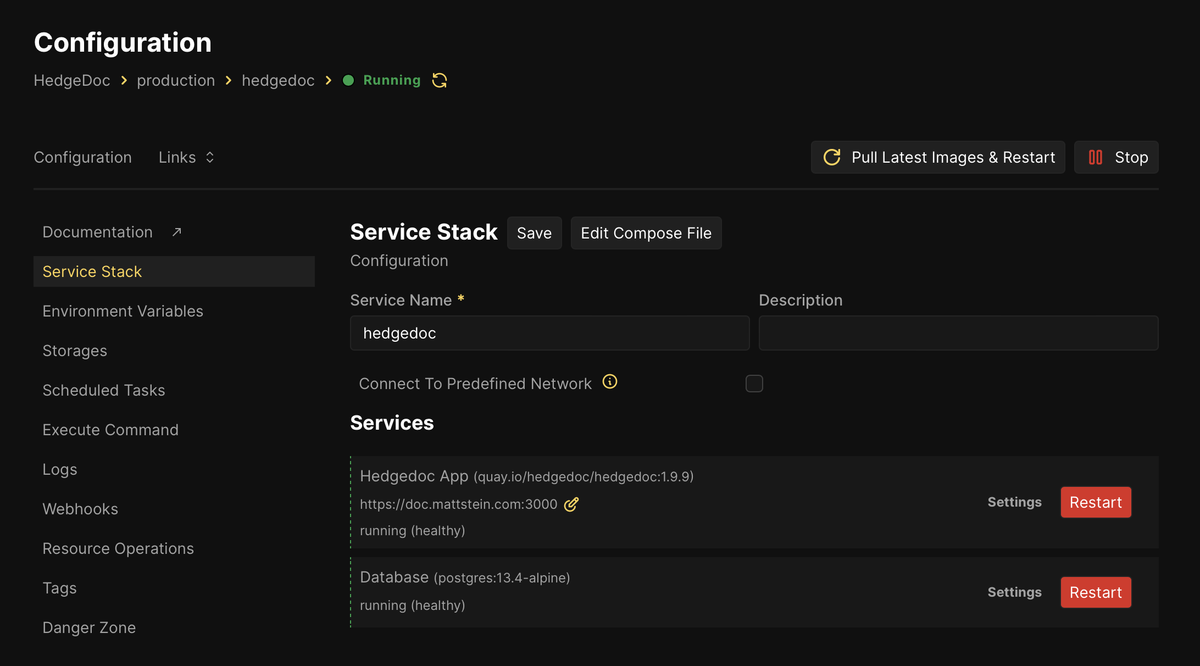
docker-compose.yaml file I pasted in.This means each container can have log drains enabled, and the database container can be quickly configured to take (and schedule) backups.
With HedgeDoc working, I could turn to my biggest little side project.
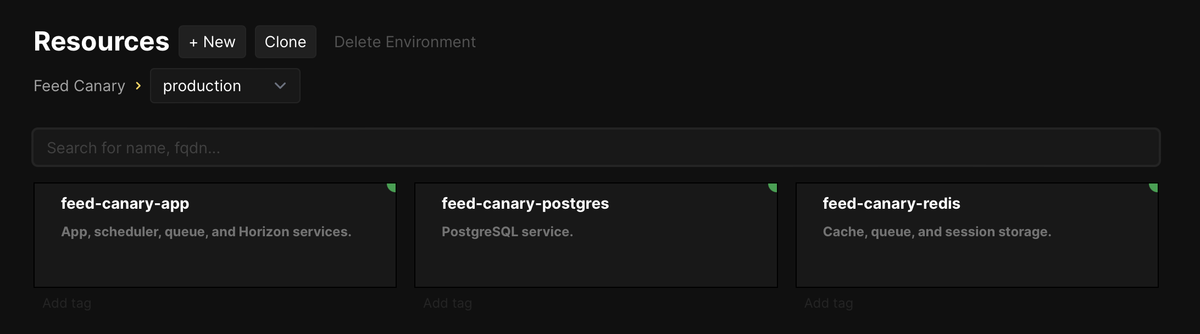
Feed Canary
Feed Canary is my Laravel app that endlessly checks RSS feeds to be sure they’re alive and valid. It relies heavily on Laravel’s scheduler and queue, includes some console commands I use for inspection and cleanup, and it runs Horizon for queue monitoring because I was curious and it has charts.
You can see what I arrived at in the coolify branch, which I owe largely to a helpful article that got me most of the way there: Deploy Laravel Apps with Coolify: The Complete Guide.
I ended up using Coolify’s GUI to map host ports for PostgreSQL and Redis so I could connect to them with TablePlus via SSH. I also added and messed with health checks until they started succeeding.
It took me a while to realize a critically-important detail: when you’ve got an environment with separate resources that need to talk to each other, you need to enable “Connect To Predefined Network”:
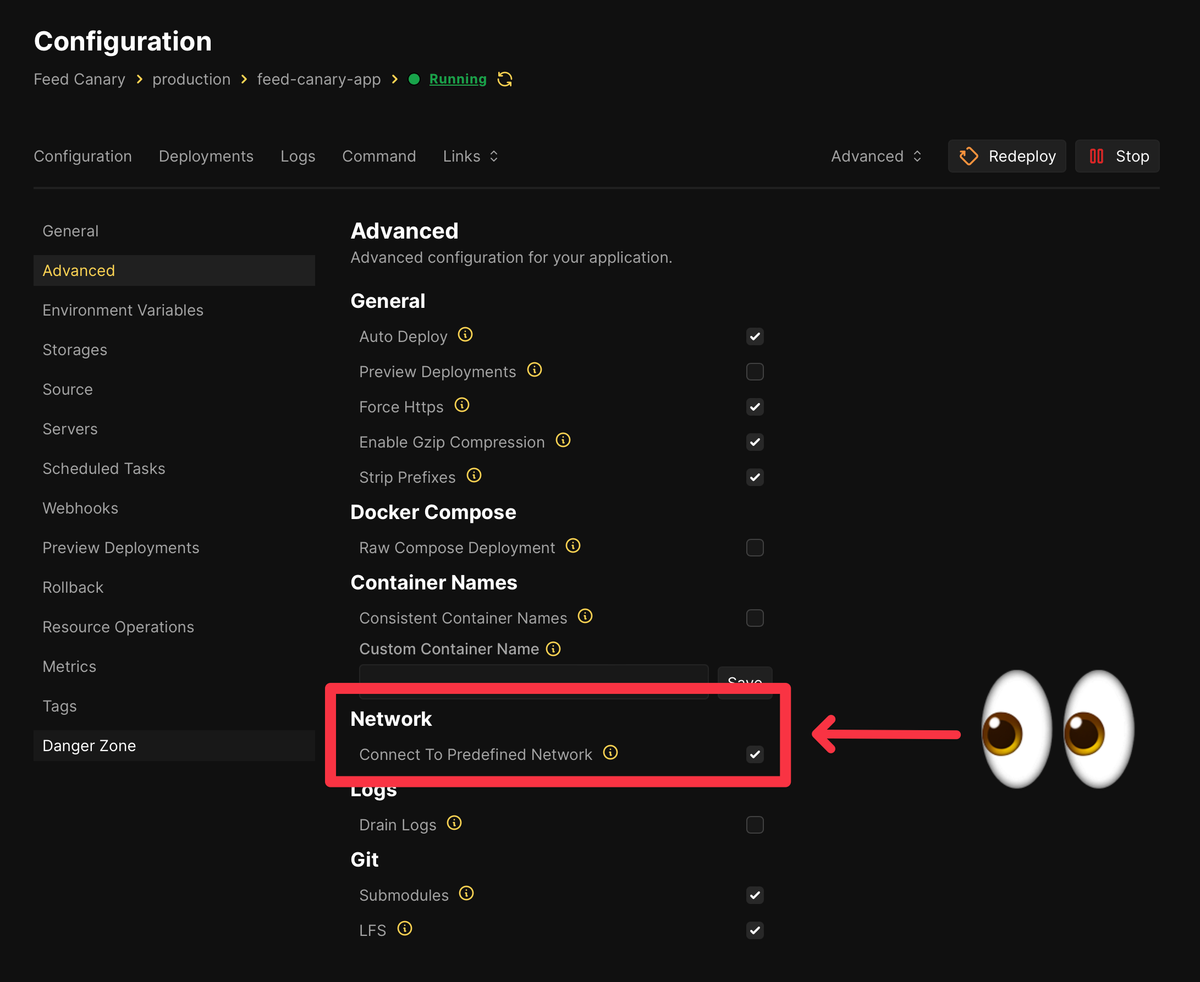
In this case, the app needed that in order to communicate with the PostgreSQL and Redis containers.
I turned off the mailer and let the Coolificated app run for a few days, and aside from having to fix some volume permissions it seemed happy! The production app is now on a new, Coolify-managed server that has much better networking and hopefully enough disk space.
Bonus: Sending Logs to Axiom
Coolify includes log drain configuration for each server, where you can add New Relic or Axiom credentials, or specify a FluentBit configuration. Once set, you can then have any app on that server send logs to that service.
But what about server logs? I want to be able to lay awake at night and worry about all those failed SSH connection attempts, for example.
I ended up (very easily)2 running the axiomhq/axiom-syslog-proxy Docker image, mapping it to the host’s ports 601 and 514, and then adding a line to /etc/rsyslog.conf so logs are forwarded to that proxy and then on to Axiom:
*.* action(type="omfwd" target="localhost" port="601" protocol="tcp")This forwards everything and I don’t think it would gracefully endure failures, so I’ll probably revise after seeing what I need and thinking through good advice.
Tips
If you’re coming from Ploi or Laravel Forge and you’re not used to working like this, you might want to start with a few things in mind:
- Make sure you use volumes for persistent data and know where it lives on the host filesystem. You want your containers to restart and not lose data, and you’ll eventually want to know where to find that data.
- Make sure your volumes have appropriate ownership and file permissions. I had to
chown -R www-data:www-datapretty much everything I messed with as the root user. (Otherwise, the app couldn’t write when it needed to.) - If you want to be able to enable, run, and schedule database backups from the Coolify GUI, make sure to add your database as a service via GUI or as part of an “app stack” that starts with a pasted-in
docker-compose.yaml. I started with adocker-compose.yamlfile that came from a git-based project, and didn’t have the option to enable backups for its database container.
Working Conclusion
I actually had fun with this, and the end result feels like a comfortable step toward container utopia, unlike running my own bare metal Kubernetes.
I’m not thrilled that deployments are slightly slower than they were with Ploi, and that they can involve a few seconds of downtime as containers are replaced—but that could turn out to be my fault. (Rolling updates work smoothly with some apps.)
I’m also bummed that container metrics are currently (and temporarily) disabled, but stats are fun to look forward to.
This seems like the beginning of some more interesting adventures, so I’m eager to keep experimenting and following along with project developments.
Hopefully I can even contribute something to it as I get more comfortable. It helps that Coolify itself is a Laravel project I can find my way around.
What I Did
- Migrated five small Ubuntu servers.
- Migrated a few handfuls projects, modifying some to be Docker-friendly.
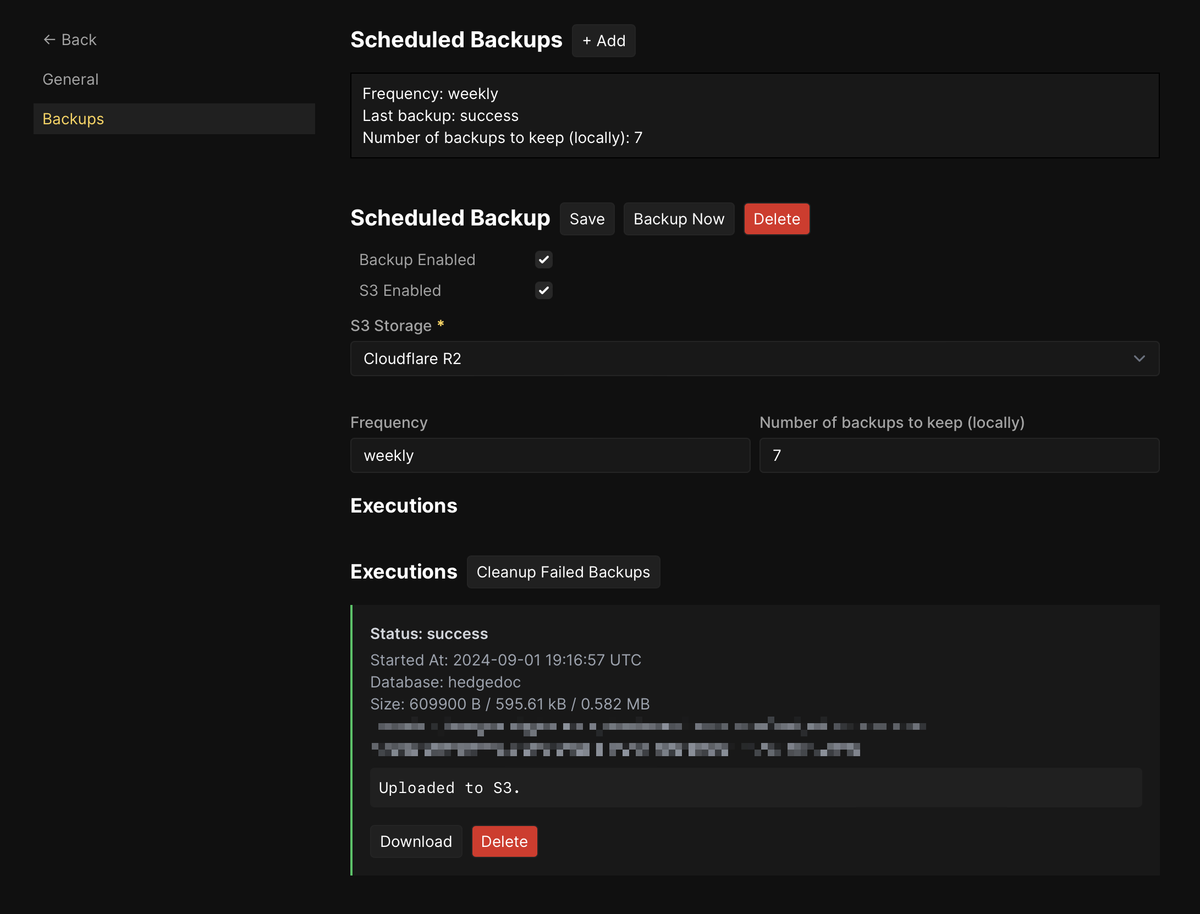
- Got database backups running and saving themselves to Cloudflare R2.
- Got some system logs streaming into Axiom, where I could keep an eye on things and set alerts.3
- Set each server up with HetrixTools monitoring again, my old habit for tracking vitals and uptime.
What I’d Still Like to Do
- Establish a clean, easy system for Docker volume backups.
- Move apps between servers to see how well (or not) that goes.
- Use Swarm with an app that’d work well with it, purely out of curiosity.
- Discover my so-far-unrealized mistakes.
- Try out the automatic preview deployments feature.
- Update my GitHub Actions pipeline to trigger a webhook deployment only after tests finish successfully.
- Use Cloudflare Tunnels.
- Utilize tags and shared variables for whatever I could be doing with them.
- Distribute an app’s components among different servers, just for the rush.
Summary Experience
- Fun transition if you’re either comfortable with Docker or interested in containerizing some projects.
- Domain setup and SSL is almost magically simple.
- Database backups (local and remote) are convenient if you’ve set your project up just right.
- Nixpacks are slick, but probably aren’t customizable enough for more complex (PHP) projects.
Footnotes
-
To be fair, Ploi can now help install Docker and deploy Dockerized apps. I just have this weird idea that Full Docker™ looks more like Kubernetes. ↩
-
I wrote this as though it naturally occurred to me like a hacker in a movie, but it was the usual cartwheeling through web searches and failures until it worked. ↩
-
Special thank you to Axiom’s website for introducing me to Berkeley Mono, which is gorgeous. ↩